Tuesday, June 17, 2014

Little Red Riding Hood

So I have been obsessed with topsy turvy dolls lately. Two dolls in one? What's not to love about that. If you get bored with one, flip the skirt and BAM! Another doll! So when I decided to make a doll for my daughter that would fit in the diaper bag, I knew I wanted it to be a topsy turvy doll. After looking at several different ones, I loved the idea of it being a little Red Riding Hood doll.
 
 
I also decided that it would be fun to knit up the doll. I wanted the doll to be small, something that would fit well in little hands and not take up all the room in the diaper bag. But all of the patterns I found were for bigger dolls. So I kind of just cobbled together ideas from a bunch of different dolls and this is what I would up with.

(I didn't write anything down as I was making it, so this is basically just what I can see and remember.) After casting on 20 stitches with a worsted weight cream colored yarn in the round, I knit about 12 rows then switched to the red. I knit 17 rows, then switched to the purple for another 17 rows. Then to end it I switched back to the cream for another 12 rows.

I then threaded the yarn through the stitches and pulled tight and weaved in the end. I stuffed the head and threaded yarn through every other stitch right about the purple and pulled tight creating the head of the Grandma. I stuffed the body and repeated on the other end. Basically creating a long tube with a head on each end.

Next was the skirt. I started with purple and cast on 20 stitches in the round. I increased using kfb every other row evenly until I had  68 stitches. Then I knit 35 rows. I then switched to red and knit the exact same number of rows, including starting decreases (k2tog) on the same row and at the same intervals as the increases.  Then I folded the skirt in half and sewed it onto the doll.

For the arms I just did and icord with 5 stitches, beginning with the cream color for 4 rows and then switched to the dress color for an additional 11 rows. Those were then sewn onto the doll.

Then it was time for the faces. For both Grandmother and Red I "weaved" in the hair color into the doll surrounding where the face was. I am not good at embroidering faces into knitting, so I simply did knots for eyes. Red was also given a couple of braids which were sewn right at the base of her head. For her cloak I cast on 22 stitches and knit flat until I had a square that was about 5" long. I also did a border of 4 stitches of garter stitch just so the it wouldn't roll. On the last row I knit half way and then using a third needle did the three needle bind off to give it a good finished look.  Then using the same technique to create the heads, I weaved yarn through the stitches and pulled tight to give a good defined hood. Then I sewed it onto the head, finishing up the Red side of the doll.

 
For the Grandmother side, I had seen the super cute idea of having the Grandmother and the Wolf dressed up as the Grandmother. So I of course thought that would be great. On one half of her face I did the Grandmother's hair like I did Red's (without the braids of course). On the other half I needed to make the Wolf's face. I counted around the head in a circle where his face would go and came up with 24 stitches. I cast that on in the round and then decreased every 7 stitches. The next row I decreased every 6 stitches, 5 the next, and so on. When it was every 2 stitches I simply knit the full row and then continued after that with the decreases until there were only about 6 stiches left (I honestly don't remember how many but that was close) then threaded the yarn through them and pulled tight and weaved in the end. By doing that it gave me a good shaped nose which I sewed black around to give it a good defined nose, and gave him a couple of eyes. I then sewed the whole face to the back of Grandma's face.


As you can see, I needed to give them a hat to cover up the change between the faces. I cast on 8 stitches and knit in garter stitch until it covered all the way around their faces. That was then sewn on. I also wanted to give them a shawl. So I cast on 6 stitches and knit in garter stitch 2 rectangles that were about 3" long. Then I sewed those onto the shoulders crossing them in the fronts giving a triangle effect.

 
She turned out to be about 8" tall and 2" in diameter. She came out to be the perfect size for what I wanted. That's not to say she doesn't have a few imperfections though. There are a few things I would change if I ever made this doll again. (Most of those were little mistakes I didn't realize until it was too late to change without completely starting over.) So even though she was a bit of an experiment, I am quite pleased with how she turned out.
 
If you want to make your own little Red Riding Hood doll I hope that this was useful. If you have any questions please feel free to comment or email me. I'll do the best I can to help.


Friday, June 13, 2014

The Red Chair

Shortly before I had my first baby, a very sweet neighbor gave me an old rocker she had had in storage for a while. Admittedly it wasn't very pretty, and she hadn't remembered that the back was broken, but I wanted it anyway. I threw a blanket over it and kept it in the baby's room.

When we bought our house I kept it in the play room for a place for me to sit or nurse while the kids play. When I turned my attention on decorating the play room, I finally decided what I wanted to do with that chair.


Here is the before. I had used a blanket thrown over it to cover it up but to also add some cushioning. It, frankly, was not comfortable. So you better believe that when I replaced the cushion (or lack thereof) I used 2" foam. It's comfy now! I know that there are tons of really great tutorials out there that show how to replace the cushion on chairs, so I checked out a couple and jumped right in.


After taking the seat off, I replaced the cushion and added new cute fabric to cover it. I then set the seat aside and began work on the rest of the chair. It had been stained at one point, so I took my little sander to it to get that off. That admittedly took a couple of hours. When that part was finally done, I started painting it. I used a paint plus primer spray paint. I used two cans, but it could have used a third. I was just so ready to be done I called it good. (It really does look fine how it is though.)

I needed a cover for the back not only for some extra cushioning, but to cover up the broken slat. I used the same material that I had used for the seat. I measured across the top and down the back to get the size of  cover I would need. I then cut out 4 rectangles that were the proper size. I sewed 2 of them together inside out, turned, and top stitched. Then with the other 2 I did the same thing, but added batting. I also topstitched 2 lines going down the front to keep the batting in place and to look nice. Then I simply sewed the 2 rectangles of fabric together and using ribbon tied them onto the back of the chair.


What a difference huh? I love it and it goes so great in our play room. I now have a really comfy place to sit with the kids in that room, if they let me. They now think it's theirs! But in my house that is just a sign of how great it is.


Thursday, June 12, 2014

Butterflies

So while looking for inspirations for décor for my daughter's room I spotted this on a new favorite blog of mine. Isn't she amazing? As soon as I saw her butterflies I knew I needed to make my own. I however used this pattern for my butterflies. I used a worsted weight so they came out the perfect size for what I wanted.


I love how they turned out. They are only two rounds, but they were kind of confusing as I was crocheting them because they look nothing like I thought they would. But as soon as I folded them in half, it's a butterfly! I also did a single crochet "stem" for the body and antenna which I slip stitched on.

I found some round wooden plaques at Joann's that were the right size for these butterflies. I whipped out my acrylic paints and did colors that were similar to the colors of my butterflies. Then I simply hot glued the butterflies to the plaques after the paint was completely dry. After hammering in sawtooth hangers they were ready to hang.


As you can see, I did a trio of butterflies. I just used yarn that I already had. So this was a quick, easy, and pretty inexpensive project that I love.

The House Shelf

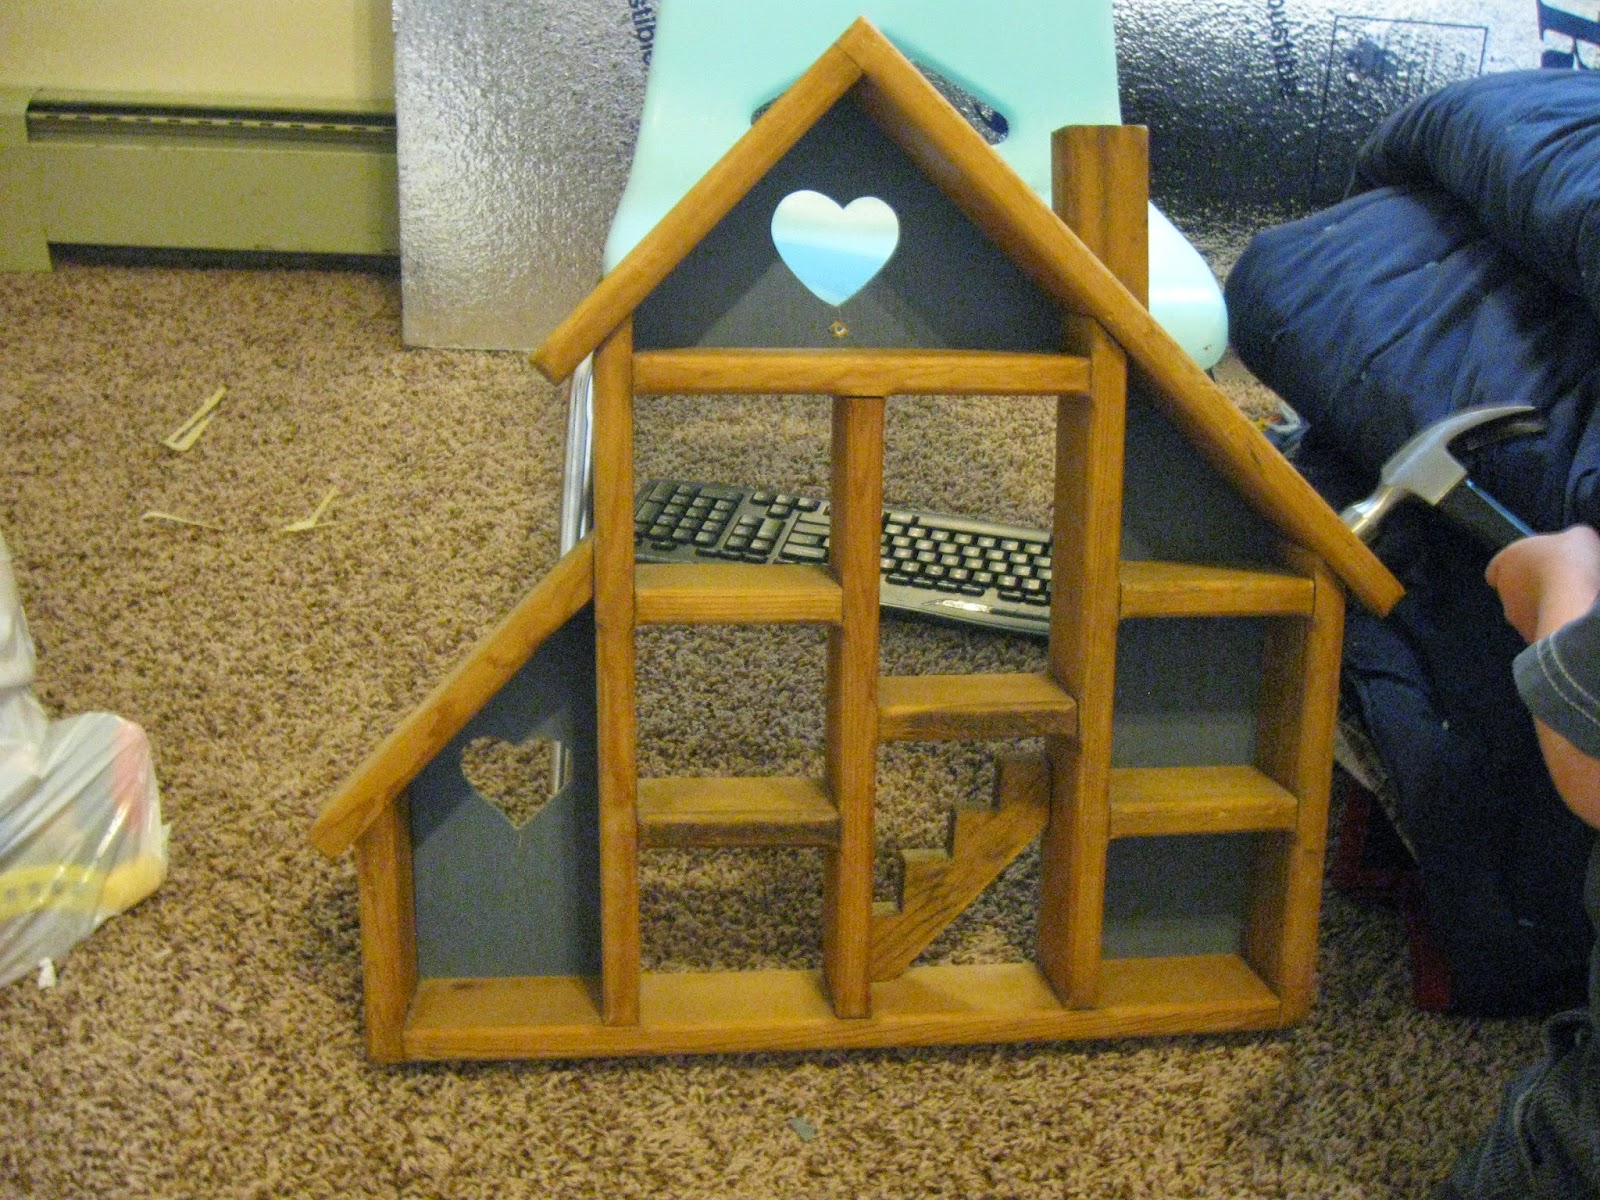
I have to admit that I am a Pinterest addict. So of course I have a board devoted to each room of the house. For my daughter's room I found several little house shelves like this one. I immediately fell in love. But of all of the ones that I could find that you could actually buy, the least expensive I found was around $80. And they all go up from there. That just isn't in our decorating budget. So I sadly resigned myself to not having one. Until a recent trip to our local thrift store, and I found this diamond in the rough.


With the shade of wood and especially the blue wood panels it just screamed "country." Which is absolutely not what I like at all. But I knew with a bit of paint and cute fabric on the back, I could get this to look how I wanted.

First thing I did was to pull off the blue panels. They were stapled on so they were pretty easy to pull off. Then I wiped the whole thing down really well to get all the dust off. That was the only prep I did because it was bare wood. Then I used a paint+primer and just sprayed the whole thing a couple of times. Then to add a bit more charm I dug through my fabric pile and came up with a few pieces that I thought went well together. I quickly stapled those on the back, hammered on a sawtooth hanger, and put it up on the wall.


It turned out quite well if I say so myself. It was also very inexpensive. After using fabric I already had, the total cost of the shelf and the paint I had to buy came to a total of about $8.  You can't beat that!

I put a couple of my daughter's little toys on, and placed it next to the butterfly plaques I made a month ago. I'd say that her room is coming along well. Slowly but surely.